Yesterday, we talked about why authors should register a domain name and how to choose the perfect one. Today, we’re going to pick up where we left off and actually go through the registration process step-by-step using GoDaddy.
I thought a video walkthrough might be useful, so I recorded a quick screencast this morning detailing the steps:
If you don’t feel like watching the video (totally understandable) or would prefer to read a step-by-step guide, I’ll go through that now. Click any of the images on the right to enlarge.
1. Add name(s) to cart
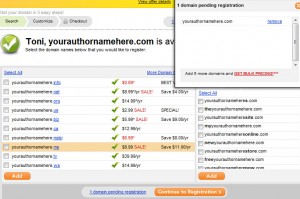 After you choose your domain name, you’ll click the checkbox beside the domain name you want to add to your cart and click ‘Add’ at the bottom of the list. As we talked about yesterday, just focus on the .com names (or .net if you prefer). No reason to register any additional ones unless you really want to.
When you’re ready, click ‘Continue to Registration.’ Log in or create a new account.
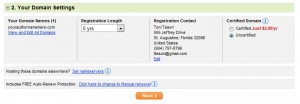 2. Choose Length of Registration
If you’re in this for the long haul, go ahead and register your domain name for five years. Google smilies just a little more fondly upon domains registered for longer lengths of time.
3. Edit WHOIS Information
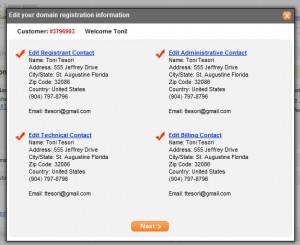 When you register a domain, certain information about you as the registrar is out on the web for all to see via a process called WHOIS lookup. If you don’t like that thought (and don’t mind paying a bit more money) you can opt for a ‘Private Registration’ option at about $10/yr. If not, your next step is to edit what’s known as your WHOIS information. Click ‘Edit’ underneath the box that says ‘Registration Contact’ in order to see the information.
Each section is automatically populated with the information on your account (if you were registered) or the information you entered in the previous step (if you weren’t). If you’d like to edit the information (perhaps to enter a PO Box instead of a physical address or less-oft-used phone number), do so here.
For our purposes, there’s no difference between the different contact titles (Registrant Contact/Administrative/Technical/Billing).
4. Details
After you’ve finished editing your contact information, you’ll see there are a couple more options we need to complete before going to the next step.
- Certified Domain – don’t worry about this one. Leave ‘Uncertified’ checked.
- Nameservers – if you have your own web hosting, enter your nameservers here. If you don’t (or have no clue what that means), skip it.
- Auto Renew Protection – “Protection” meaning they’ll automatically charge your payment method after your registration term is up to avoid you forgetting and losing your domain. I always switch this to Manual renewal, but it’s up to you.
After you’re satisfied with those options, click Next.
5. Privacy
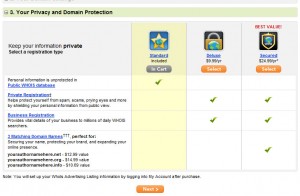 Like I said above, the contact information you entered in the previous step will be visible to the web unless you opt for Private Registration here. If you feel more comfortable, you may want to choose this option. You’ll take a little hit in Google’s eyes, but not so much that it’s worth not doing if it would make you feel safer.
I will say this: I’ve been registering domains for close to 10 years now and have never opted for Private Registration. I’ve never had an issue – but it’s totally up to you and what you feel comfortable with.
After you’ve made your decision, click Next.
6. The Page Where They Try To Sell You Stuff
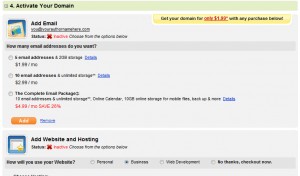 As I said yesterday, GoDaddy doesn’t make their money on domain names. This is the page where they try to sell you stuff before you finish purchasing your domain name.
If you’re thinking of getting web hosting, don’t do it through them. I’ll have another post coming up in the future with recommendations and the process for doing that (or, if you want to know now, shoot me an e-mail).
If you’re planning to forward your domain name to a blog or other website, you may want to sign up for e-mail here, but that’s about as much as I can safely recommend.
Just a note: you can sign up for any or all of these services after you’ve registered your domain.So, if you’re not interested or not sure, just do what I do and scroll down the page and click Next.
7. Review Your Shopping Cart
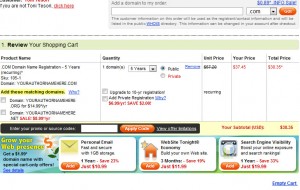 Double-check your shopping cart to make sure everything is as you’ve set up, ignoring the last few pleas to upgrade or purchase additional features.
8. Save some $$$
The last step before we check out: visit this site for valuable coupon codes. Because of it, I’ve never paid more than $8/yr for a domain.
Choose a code (or two) that’s applicable to your purchase (for instance, if you opted for Private Registration, check to see if there is a promo code for that). Copy and paste it into the ‘Enter your Promo or Source code’ on the Review Your Shopping Cart page. Click ‘Apply Code’ and check out your savings!
9. Check Out
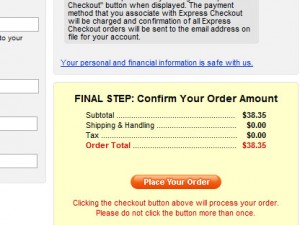 When everything looks good, choose your payment method, accept the terms of service and click ‘Continue with Checkout’ to review your order.
Enter your payment details and, when you’re ready, click ‘Place Your Order’ to complete the process!
10. Congratulations!
You’re now the proud owner of your domain name. If you need help setting up forwarding or separate web hosting, give me a shout or mention @duolit (psst: we’ll likely cover it in an upcoming post as well — subscribe to be notified).
Also note that if you’d like a pretty new website to go along with that domain name, we can certainly hook you up.
That process really wasn’t so bad, huh? Let us know how you did! Please share your new domain name and/or thoughts on the process in the comments below.
 We're
We're 


Pingback: 5 Key Elements of Author Branding | Self Publishing Team | Duolit()
Pingback: [BLOCKED BY STBV] Week in Review()